Showing posts with label Desserts. Show all posts

Monday, August 2, 2010

Bread & Butter Pudding . . . . The Sticky Date version!


As I have posted many, many times, I hate waste. The amount of food that gets thrown out by many homes is ridiculous. I'm not fantastic either, but i do try and use everything that I can (make stocks from roasts, or meringues with the eggwhites not needed for making ice-cream etc).

Its winter which makes it prime sticky date making time! I made one last weekend, but as it was just for one friend & I, there was quite a bit left over, which was clingwrapped & placed in the fridge. 

I am not a fan of regular bread & butter pudding, which is no doubt a hangover from school days, where it was insipid white bread soaked in batter & served as a steaming congealed mess. My Mum made a brilliant version though with some croissants that were a day or so old. 

Bread & butter pudding is traditionally made with sultanas. I didn't have any, but I did have some dates. You are meant to soak them in brandy, but I didn't have any, so I used the port instead.

So I thought . . .  . . what would a sticky date / bread & butter pudding be like? The answer: Freaking Awesome! This is one of the best puddings I have made this year!

85g dates, chopped
2 tbsp port, warmed
5 eggs
300ml pouring cream
300ml milk
40g caster sugar
1 tsp vanilla
1/2 tsp cinnamon
8 x 1.5cm thick slices of white bread
(or old sticky pud, or croissants, or brioche)

Preheat the oven to 180'c. Soak dates in the port. 

Combine eggs, cream, milk, sugar, vanilla & cinnamon in a jug & whisk to combine. Butter an oven-proof dish, and lay the slices of whatever you are using in the dish, scatter over the dates & the port, then pour over the batter, and let stand for as long as you can (an hour is great) so that the slices absorb some of the batter. 

Scatter some sugar over the top, and then bake for 30-40 mins until golden. Serve with vanilla ice-cream or thick cream. 

Thursday, July 22, 2010

Sticky Date Pudding!


I think I can honestly say I have never met anyone who doesn't like Sticky Date Pudding. And before you correct me, please note that I don't care to know anyone who doesn't like Sticky Date Pudding. So there!

I made this pudding for a family dinner recently, and it was so yummy. It was quite easy to put together (the recipe is from Stephanie Alexander's 'The Cook's Companion'). And it really is the perfect dessert for those cold winter evenings.

Serve w/ thick cream, or my preference, vanilla ice-cream.

Yummmmmmmmm!

Ingredients
Pudding
170g dates, stoned & chopped
1 tsp bi-carb soda
300ml boiling water
60g unsalted butter
3/4 cup caster or brown sugar
2 eggs
170g self-raising flour
1/2 tsp pure vanilla
Sauce
400g brown sugar
1 cup thick cream
250g unsalted butter
1 tsp pure vanilla
(or 1 bean, split)

Preheat the oven to 180'c and butter an 1 litre oven-proof dish (or a cake tin is fine). Mix the dates & bi-carb soda together in a bowl, then pour over the boiling water & leave to stand.

Cream butter & sugar, then add the eggs, one at a time, beating well after each one. Fold the flour in gently, then stir in the date mixture & vanilla. Pour into the prepared dish & bake in the centre of the oven for 30-40 mins, or until it passes the skewer test (that is, if you poke a skewer in it comes out clean).


Do not turn the oven off.
To make the sauce, bring all the ingredients to a boil in a saucepan, then reduce the heat and simmer for 5 minutes. If you used the vanilla bean, remove it, then pour a little of the warm sauce over the pudding and return it to the oven for 2-3 minutes, allowing the sauce to soak in.

Remove, and serve w/ extra sauce!


Monday, June 28, 2010

Peanut Butter Pie!


So it was my annual Thanksgiving dinner on Saturday night, I do think it was my best ever! The turkey was amazing, the soup turned out just fine, and the pies were all pretty good!

This recipe is from Maggie Beer's cookbook 'Maggie's Kitchen'. It has a number of wonderful recipe's in it, and, as I have previously posted, I really do feel that all her cooking is very approachable & 'common sense-ish'. She does amazing recipes very simply, which mean that even someone with meagre cooking skills could easily make this pie.

This pie requires minimal baking (the base for 10 mins), but substantial fridge time - a minimum of 4 hours, ideally overnight. I then pull it from the fridge when I'm serving the main course, giving it a chance to come to room temperature a little, before slicing & serving it up.

I absolutely intend to make this again, the only thing I would do differently is perhaps use 50% chocolate from the top. I found the 70% chocolate (I use Lindt) to be a bit too dark for my tastes, and I am a dark chocolate fan! I think something lighter, with a bit more sweetness, would have been better. Entirely a matter of taste of course!

Maggie Beer's Peanut Butter Pie

the crust
180g wheatgerm biscuits (I used Digestives, but Arrowroot, or Breton crackers would work well to)
90g unsalted butter, melted
3 tsp caster sugar

the filling
1 cup (250ml) pure (thin) cream
1/2 cup (75g) caster sugar
320g cream cheese, chopped, at room temperature
375g crunchy salt-free peanut butter

the topping
150ml thickened cream
150g dark chocolate (70 percent cocoa), chopped
20g unsalted butter

Method
Preheat oven to 180 deg C.

Pulse the biscuits in a food processor until they all crumbs. Add sugar and melted butter and pulse to combine, then press into the base of a 22cm springform cake pan. Bake for 10 minutes. Set aside to cool.

For the filling, place the cream and sugar in a saucepan and simmer over low heat for 3-4 minutes, stirring until the sugar dissolves. Make sure you keep stirring until it dissolves, or else the sugar will form into sort of rock crystals, and will not be usable.

Blend the cream cheese and peanut butter in food processor until combined. Add the cream mixture and pulse to combine (or mix in by hand). Spoon the filling on top of the pie crust and leave to cool.

Now at this point, I popped it in the fridge for an hour or so. This is only because I had forgotten to get chocolate for the topping, and had other things I needed to do before popping to the shops. I think refrigerating for an hour or so works well. But it isn't in the recipe instructions.

For the topping, bring the cream to just below boiling point in a saucepan over high heat. Place chocolate and butter in a heatproof bowl, then pour the hot cream over. Leave for 3 minutes without touching. Then gently stir to melt the chocolate and butter into the cream. Pour the topping over the pie.

Chill the pie in the fridge, uncovered, for 4 hours or longer.

I put a piece of baking paper over the top as my fridge was packed w/ a heap of different things, and I didn't want any of the smells to get in. Again, this isn't in the recipe instructions.

I would suggest serving very thing slices . . . it is pretty rich!

Monday, June 7, 2010

Spiced Apple Mergingue: oh my!


I made a new friend on the weekend! How exciting is that!

This dessert was the final course of lunch w/ my new friend, who happens to be gluten intolerant.

As I have previously posted, I am not a fan of gluten free flours etc, they just don't work as well, and frankly I don't see the point of 'imitation'. Either go whole hog, or don't bother.

So what could I do w/ winter fruit, and no flour?

Stew some apples w/ cinnamon & cloves (am reluctant to call it 'stewed apples', but that, effectively, is what it is), pop stiff eggwhites on top, and put the whole thing in the oven.

Spiced Apple Meringue


 4 apples, peeled & cored (I used Granny Smiths)
1 cinnamon stick (or 1 tsp of ground cinnamon)
4 whole cloves (or 1/4 tsp ground cloves)
4 eggwhites
50g + 3tbs sugar

Grease an 1.5ltr oven proof dish w/ butter & set aside. Preheat your oven  to 150'c.

Put the apples, 50g of sugar in a saucepan w/ 2 tbs of cold water, and gently cook, stirring ti dssolve the sugar, at which point you add add the cinnamon & cloves. Keep the heat on med-low, and pop the lid on the pot.


Whisk your eggwhites until peaks form, then, w/ the motor still running, add the 3 tbs of sugar, one tablespoon at a time, making sure each tablespoon is well incorporated in between. Keep beating until stiff peaks form, and the eggwhites are glossy.


 I left my apples to infuse overnight, but this isn't really necessary (though it did give them a wonderful flavour). If using the cinnamon stick & whole cloves, pick them out, then line the base of your ovenproof dish w/ the apples, then spoon the stiff eggwhites on top.


Pop into the oven, and bake for 25 - 30 mins, or until the meringue is puffed up & golden.
Serve immediately, as the meringue will deflate when removed from the oven.

I served it w/ thick cream, though vanilla ice-cream, or even custard, would work very well too.


Wednesday, May 26, 2010

Roast Berries & Oats w/ Yoghurt: yummiest, healthy dessert!


I was standing in Harris Farm (yes, I love it) tonight trying to think of a yummy, healthy way I could end my meal. Being winter, the 'fruit' options in this regard are somewhat slim on the ground. Don't get me wrong, I really like apples (not so wild about oranges: all those years of oranges at half time during hockey matches). I like apples, but when I feel like something appetising & sweet after dinner, a crisp apple is not what springs to mind. 

In summer I make a dessert that is kind of like a free form 'trifle' (don't let the 'trifle' in this sentence put you off - please!). Take a glass tumbler, put a layer of muesli, then some yoghurt, and then some fresh berries. Repeat if space as many times over as the tumbler will allow. I love to use 'Whisk & Pin Mountain Muesli' when I make this. 

However, most muesli isn't as healthy as it appears. I wouldn't want to speculate whether or not this is true of my fave 'Mountain Muesli', but where I can I try and simplify things even more. I felt like berries, and yoghurt, but wanted something with a bit of texture in there. Standing & staring at the rows of biscuits (which I thought I could just crumble on top), I had a brain wave.


What would happen, I wondered,  if I took some frozen raspberries, and scattered some simple, plain rolled oats over the top, and sprinkled a pinch (a biggish pinch) of brown sugar over the top, and then popped it into the oven preheated to 180'c for 20 mins or so. 


And what would happen if I then took this toasted berry/oat combo, and scattered it over my favourite grocer's lush yoghurt w/ raspberries?  

What would happen? 

Awesome! That is what happens!


Friday, May 14, 2010

Dessert: Cherry Clafoutis


Hey!

So I have written this recipe out for a few of you in the past: it is a very simple dessert, wonderful in winter, and works really well w/ a heap of different fruits.

The 'basic' version of this recipe I get from Donna Hay's Modern Classics (Book 2).

You can put in nectarines, peaches, plums, raspberries, blueberries, cherries or any other fruit you think will work well (nectarines & raspberry combo is especially good).  I especially like to use frozen fruit. As they are snap frozen, they keep much of their flavour, often more so than what ever week(s) old fruit the major supermarkets have sitting on the shelf.

Cherry Clafoutis


butter, softened, for greasing
1 cup frozen cherries
1/3 cup plain flour
1/3 cup caster sugar
1 teaspoon vanilla extract
1 cup pouring (single) cream
3 eggs


Preheat oven to 180'c.

Grease an 8 cup (med-large) oven-proof dish w/ butter (do this well - you don't want it to stick!). Tip the cherries into the greased dish.


Combine the flour & sugar in a bowl, and whisk in the cream. Add the vanilla & the eggs, mixing well to combine.

Pour into the dish, covering the cherries, and place into the oven for 35-40 minutes, or until golden & puffed up.

Serve w/ either thickened cream or vanilla ice cream.

Wednesday, May 12, 2010

Flourless Chocolate & Raspberry Cake


Hello: and a big shout out to Yolande!

I am a big fan of flourless cakes: with their rich, dense flavours they make a great dessert, or a rich addition to an afternoon tea. Perfect with a cup of lovely coffee.

Most flourless cakes tend to be chocolate inspired: I suspect this is because chocolate holds its own form so well: if you were to mix eggs, sugar , almond meal, & say, vanilla, all together you wouldn't get the worlds best cake. Eggs, sugar, almond meal & chocolate is a very different story.

I have seen allot of recipe's for 'gluten free' cakes, using gluten free flour. I will try one of these down the track, but having eaten gluten free pasta, I can't say that I am in a particular hurry to do so! But I am curious to see if a decent, non-chocolate, gluten free cake can be made, so watch this space.

I have made flourless chocolate cupcakes for ages now, adding raspberries to the mix, and it is really just the most wonderful combination: the rich dark-choc flavours, the slight nuttiness from the almond meal, all in a wonderfully moist & dense cake, with the raspberries hidden in the mix giving a sweet/tarty hit.

Flourless Chocolate & Raspberry Cake

250g chocolate, broken into small bits
5 eggs, separated
3/4 cup caster sugar
1 + 1/4 cup almond meal (or hazelnut, whichever you prefer)
1 cup frozen raspberries

Ganache
150g dark chocolate, in small bits
1/3 cup pouring cream

Grease & then line w/ baking paper a 20cm round springform cake tin. Preheat your oven to 170'c.

Melt the chocolate.

I find the best way to do this is to zap the choc for 20seconds in the microwave (on high). Take it out, stir a bit, then pop in for another 20 seconds. Keep going until the chocolate becomes 'soft' looking (I find it is approx 3x20sec bursts), at which point stirring should be enough to turn it into a chocolate puddle. Don't be tempted to zap it again: the chocolate will overcook & then it won't be any use to you.


Take your eggwhites & put them into the bowl of your mixmater (if you don't have one, I hope your biceps are in a strong state!), fit it w/ the whisk attachment & beat the eggwhites until soft peaks form.


In a separate bowl, take the egg yolks & 1/2 cup of the sugar & beat until thick & pale.


Add the remaining sugar, one tablespoon at a time, to the eggwhites, beating the whole time, until stiff peaks form.


Add the almond meal to the chocolate mix, stirring to combine, then add the egg yolk/sugar mix.

With a large metal spoon, gently fold in half of the stiff eggwhites to the chocolate mix.


Once incorporated (don't overwork it), add the rest of the eggwhites, then fold in the raspberries & stir to combine. Pour mixture into the prepared cake tin, and bake for 1 hour, or until done (skewer test should give you some moist crumbs, not come out completely clean).


 When done, remove from oven, leave in tin to cool for 10 minutes before inverting onto a rack to cool completely (or you could serve this still -warm, w/ a dollop of thick cream, as a delicious dessert).

Meanwhile, combine the ganache ingredients together in a small saucepan, and put over medium-low heat until the chocolate starts to melt. Remove from the heat, stirring continuously until you have a lovely glossy chocolate sauce. Allow to cool (I cheat & pop this into the fridge to speed things up).

Once chilled enough that it is set, but still spreadable, use the ganache to ice the top of the chilled cake.

If serving the cake as dessert, you could drizzle the warm cake slices with the ganache for a chocoholic's delight choc-pudd!

Saturday, May 8, 2010

Mum's 60th birthday Recipe Requests - Lemon Syrup Cake

So I hosted my mother's 60th birthday last night, and it was a lovely evening.

For the birthday cake I made a delicious lemon cake, and it really was so yummy! By request, here is the recipe:

Lemon Syrup Cake 
This cake is very easy to make, and it is just delicious. If at all possible, serve it still slightly warm from the oven with a dollop of thick cream. This has a wonderful lemon flavour, and don't worry about the syrup, it isn't either to citrusy or too sweet: it really is just perfect.

Ingredients
Cake
melted butter
250g self-raising flour
pinch of salt
1 tsp baking powder
grated zest of 1 lemon
200g caster sugar
250g softened unsalted butter
4 large eggs
Syrup
2/3 cup caster sugar
juice of 1 lemon

Preheat oven to 160'c. Line a 24cm springform tin with baking paper. Brush paper & sides of tin well w/ melted butter. Stir flour, salt & baking powder into a bowl.

In a food processor, blitz (really, really blitz) the lemon zest & sugar in a food processor, then add the softened butter until thick & pale.

Add 2 of the eggs, pulse well to combine, then the1/2 flour, the last 2 eggs, then the rest of the flour, pulsing to combine well in between each addition.

Tip the batter into the prepared tin, and bake in an oven for approx 1 hour.

To make the syrup, dissolve the sugar in the lemon juice in a saucepan over medium heat.

Cool the cake for a few minutes in the tin before allowing to cool on a rack. Pierce the cake in a few places before pouring the syrup over, so that it really soaks in.

This is from Stephanie Alexander's seminal book: 'The Cook's Companion'.

She recommends allowing the syrup-soaked cake to cool completely before serving.

If this were a cake for afternoon tea or similar, serving the cake cool is what I would do.

As I noted above, last night I served it warm w/ a dollop thick cream, and it was fantastic. I'd do it this way if you were after a more 'dessert' type of treat.

Wine Match!
This is lovely with a simple glass of champagne for a tres elegant afternoon tea or dessert. A nice riesling could be good too - ask your bottle shop to recommend one to work with lemon flavours; you wouldn't want a riesling high in sugar as that would just be overwhelming I think. If you wanted the ultimate citrus hit, you could serve this with a glass of chilled lemoncello

Wednesday, May 5, 2010

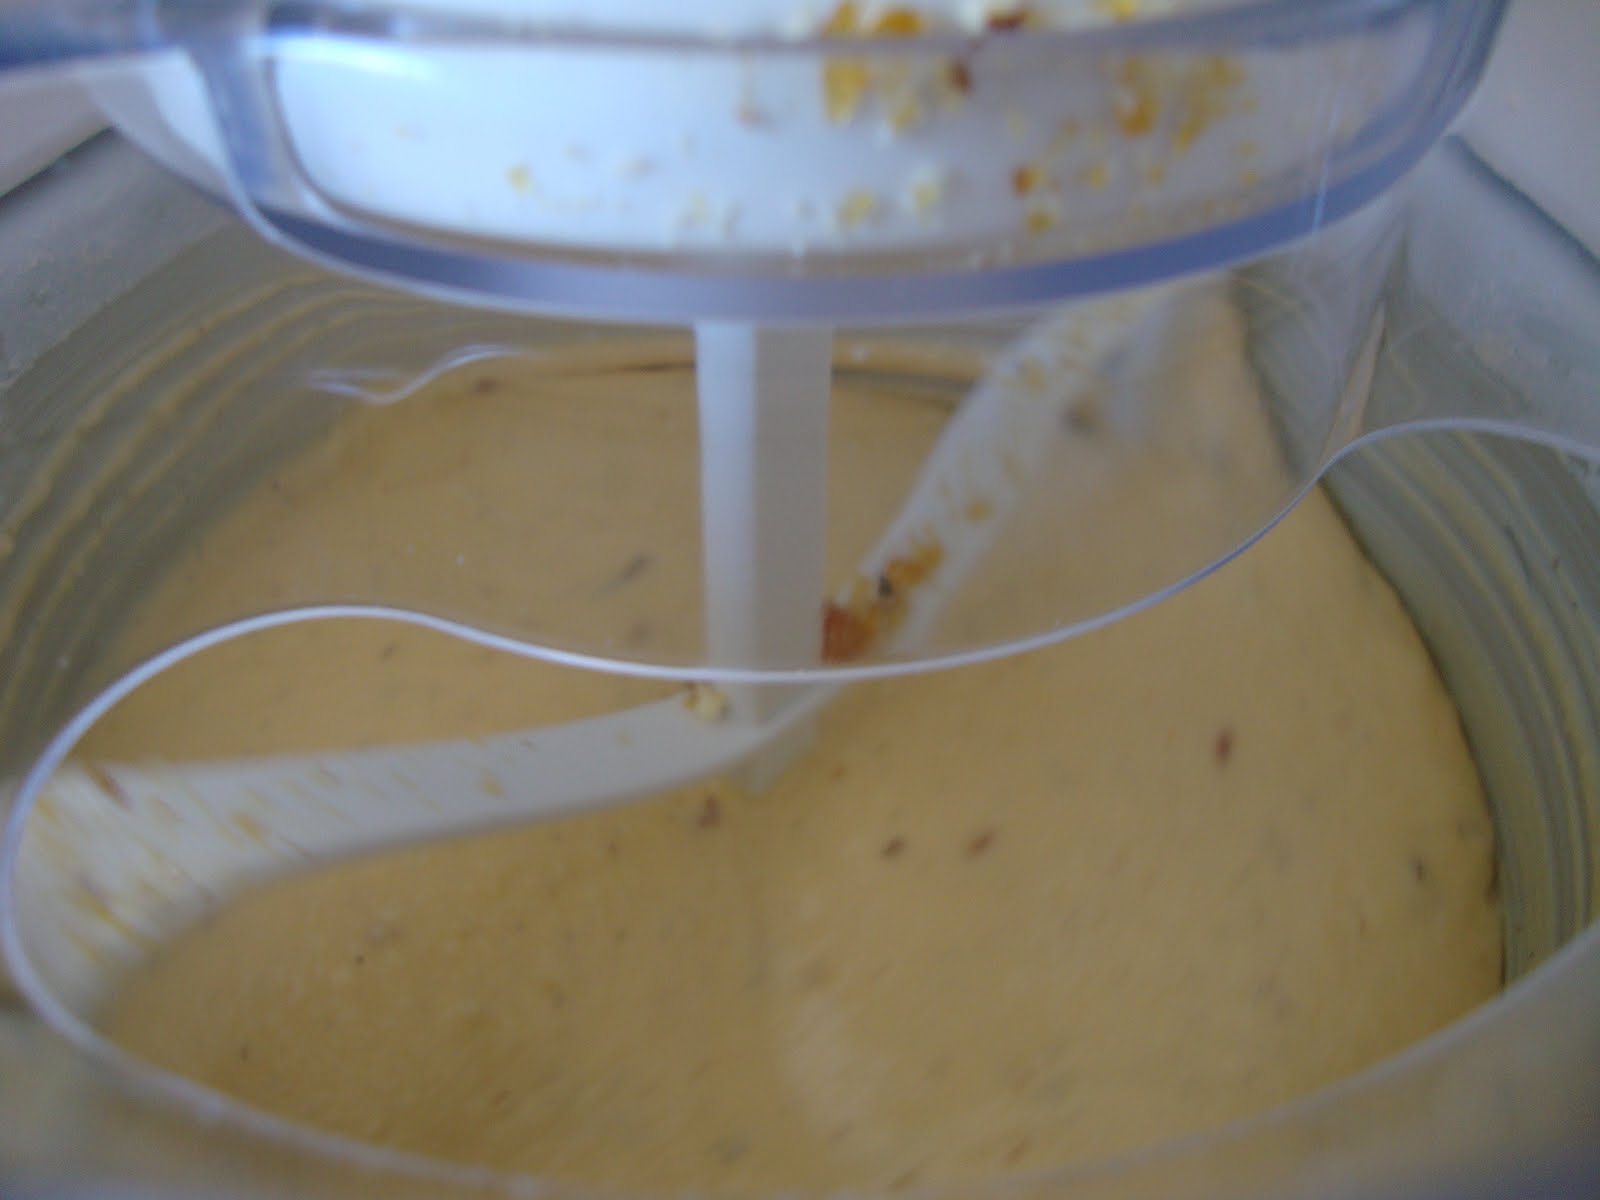
Home-Made Praline Ice-Cream

Yes, I make my own ice-cream!

It is relatively straightforward, but if you take your eye off it during the thickening process, you do risk curdling the mix. But your patience & observation will be rewarded: home-made ice-cream is so much better than the store bought stuff.

I am lucky enough to own an ice-cream maker, but you don't necessarily need one. If you use some electric beaters, and then pop in the freezer for 25 mins, then beat again, and repeat 3 or so more times, you will have a lovely creamy ice-cream. 

Ice-cream needs to be beaten to stop the water molecules turning into little ice-crystals; by beating the ice-cream you disperse the water molecules, stopping them from forming into crystals & have a lovely creamy consistency as a result.

This ice-cream is the one thing I know my friends would almost start swinging over to get their share (shout out Mama Nat! xx)

Anth's Praline Ice-Cream


For the Praline:

Preheat the oven to 180'c.

Place 1/3 cup blanched almonds on a baking tray lined
w/ non-stick baking paper & bake for 10 mins or until golden. 


Place 1/2 cup of caster sugar & 1/4 cup water in a
saucepan over low heat & stir until the sugar has dissolved. Do ensure that all the sugar dissolves, or you will end up w/ hard sugar crystals that are of no use to anyone.


Increase the heat and boil the mixture until a lovely golden colour:


Remove from the heat, allow the bubbles to sub-side & pour over the almonds.


When set, break into rough pieces, and then (to make it fine enough for ice-cream) blitz in a food processor until a fine-ish powder, though still with the occasional nice lump.

For the Ice-Cream:
1 cup full-cream milk
2 cups single (pouring) cream
1 vanilla bean, split & seeds scraped,
OR
1 tsp vanilla paste
6 egg yolks
2/3 cup caster sugar

Place the milk, cream & vanilla (whole bean & seeds, if that is what you are using) in a saucepan over medium hear & heat, stirring occasionally, until hot but not boiling. Remove from the heat & set aside.

Place the egg yolks & sugar in a bowl & whisk until thick & pale: this is an important step, so don't skip on the whisking! Remove the vanilla bean from the cream mixture (if used) and slowly pour over the egg yolks whisking continually to combine.

Pour the mixture back into the saucepan & stir over low heat for 4 minutes or until the mixture is thick & coats the back of a wooden spoon, so that when you drag your finger across the back, you easily leave a line. 

Set aside to cool, then cover in clingwrap & place into the fridge until cooled. 

If using an ice-cream maker, pour the mixture in & churn. 

Once the mixture has hardened somewhat, pour in the praline powder & continue churning. 

If using beaters, pour into a large, strong plastic container, and beat for 2 mins before placing in the freezer. Pop into the freezer for an hour and a half or so, then take out and beat again; freeze for another 1.5 - 2 hours and add the praline now before beating a final time, then store in the freezer until ready to serve.  

Wine Match

Serve this with a dessert-glass of chilled butterscotch schnapps: delicious!

Monday, May 3, 2010

Chocolate Dessert that DID turn out!


This, I am proud to say, is something I made!

To quote my friend Mikarla, it "looks like a chocolate bathtub!"
This, obviously, is a very chocolatey chocolate tart, and it was delicious. Not overwhelmingly chocolatey, but still rich & lovely, and very, very smooth.

I find tarts make a great dessert, because you can do so much of it ahead of time, reducing one's stress in the hour or so before guests arrive. They also look impressive . . . yes, I have an ego, who knew! The first couple I ever made were a little hit & miss, but I have started to develop a knack for them, and pies. My pastry making is developing nicely.

Pastry-Making Tips:Gluten is the enemy of good pastry

1) Care must be taken to blend the butter (or whatever fat agent you are using) & the flour together before adding any liquid. This ensures the flour granules are sufficiently coated with fat to inhibit water absorption, making it less likely for the gluten to develop.

2) On the other hand, overmixing releases the gluten, allowing them to create long strands that toughen the pastry. Always pulse in the food processor till the mix resembles breadcrumbs, and then stop!

3) Chill the pastry in the fridge. If the fat melts before it reaches a high enough temperature (e.g. before it goes into an oven of 180'c) you won't get a lovely leavened (crumbly) pastry: when the fat melts the water in it separates & the layers in the mix will all stick together, creating, in other words, tough pastry.

4) Chilling the pastry also allows the gluten's to relax, which means that your pastry shouldn't shrink (too much) when you bake it.

5) I find the best shape to chill the pastry in is a flattened disk. I have seen some recipes that say 'roll into a ball & chill'. I find the ball shape very hard to roll out: it has a tendency to crack, meaning I have to mush the whole thing back together, which means the pastry is getting worked more than ideal, potentially leading to tougher pastry. You don't want something like a fist. You want something like the open palm of your hand.


Anth's Chocolate "Bathtub" Tart


Chocolate Pastry Shell
200gm plain flour
60gm icing sugar, sifter
30gm good quality cocoa powder, sifted
100gm cold butter, coarsely chopped
2 egg yolks
enough iced water to form a ball (if necessary - depending on the eggs you may not need to add any)

Creamy Chocolate Filling
300ml pouring cream
300gm chocolate chopped
100gm chocolate, min 60% cocoa, chopped

1) For chocolate pastry, process flour, icing sugar and cocoa in a food processor until combined. Add butter, process until mixture resembles fine crumbs, then add egg yolks, process to combine. Add iced water if needs be, a little at a time. Turn onto a lightly floured work surface and bring pastry together with the heel of your hand. Wrap in plastic wrap, refrigerate for 1 hour to rest.

2) Preheat oven to 180c. Roll out pastry on a lightly floured surface to 3mm thick and line a 28cm-diameter loose-bottomed tart tin, trimming edges if you prefer; as you can see from the pictures, I prefer a more rustic look. Refrigerate for 1 hour, then blind bake for 8-10 minutes, remove paper and weights (either baking weights, or dried pulses, or rice works as well) and bake until dry and crisp (8-10 minutes).

3) Bring cream to the simmer in a small saucepan over medium heat, add chocolate, stir until smooth, remove from heat, allow to cool a little, then chill in the fridge w/ a clean tea-towel over the top (clingwrap will collect the condensation, which could drop back onto the chocolate. Chocolate + water don't mix). Once cooled, but still just runny, pour into the pasty shell & then return to the fridge to set.


Wednesday, September 16, 2009

Sweet Panna Delight!

I had intended to make this two separate blogs, but as my typing ability is severely limited at present (after my front door slammed shut on my right hand Monday morning), I will take the easy way out and merge this into one mega-sweet blog.


BTW - If you are a diabetic stock up on your insulin before reading on!


Raspberry & Vanilla Panna Cotta
So this picture doesn't do it justice, as this is what it looked like after 2/3rds of it had been eaten! It wasn't wonky when I served it to, you know, human beings!

A friend whom I adore, and a new friend I was seeking to impress, came to dinner Saturday night.

The main course was seafood tagine, which was just so amazingly simple & delicious: a combination of barramundi, calamari, prawns, roasted red capsicums & tomatoes. Throw in lots of cumin, a few handfuls of fresh coriander, and cook. It turned out better than I could have hoped.

It also enabled me to put to good use the amazing tagine my thoughtful FM & said adored friend gave me for my birthday.

For dessert, I decided to make something I had done before, but with a twist.

This recipe is from the Donna Hay Modern Classics 2 cookbook. It is actually a Peach & Vanilla Panna Cotta recipe, but as peaches aren't yet in season, and the FM fancies anything raspberry,
I thought I'd try it this way.
In the recipe you are meant to make a sugar water, poach the peaches, slip them of their skins, and add gelatine to the poaching liquid to make the jelly.
In my version, I steeped about 500g the frozen berries in a bottle (750ml) of sparkling rose.
I then made the sugar water (1.5 cups water w/ .5 cup sugar), and using a slotted spoon put 4/5ths of the raspberries into the sugar water. They go quite mushy, but I think this just adds to the intensity of the flavour. Add enough gelatine to set the liquid (1tsp should set 250ml), and then toss the reserved berries over the base of the dish, before pouring over the gelatine mix.

Refrigerate until set (per above).

(With the sparling rose mix used to steep the berries, pour it, and a few of the berries, into a saucepan & reduce by half. It has the most vibrant & intense flavour, and is great to pour over ice-cream, yoghurt, other berries, to dip madelines into. I also once added to an ice-cream I was making as it was churning to make an amazing raspberry swirl . . . delish!).

Next make the Panna Cotta, which really couldn't be simpler:
3 & 3/4 cups of cream , 1 cup of icing sugar & 1 tsp vanilla extract into a saucepan over med heat (except I used vanilla paste, as I like the look of the vanilla seeds through the cotta). Stir to combine, and then gelatine (again 1tbs per 250ml, softened in cold water). Add the gelatine & the water used to soften it, simmering over a low heat for 4 mins until dissolved.
Cool to room temperature, and then pour on top of the set raspberry jelly.

You want to refrigerate this for at least 6 hours, or overnight. Cover with clingwrap, so it doesn't take on the smell of anything else in the fridge as it sets.
JUST BEFORE SERVING, dip the pan into warm water, and upend. Slice & serve immediately.
If you do this too long before serving, it will start lose its shape a a little (per the top photo, which was about 24 hours old).

Turkish Delight Cupcakes

(and hello to my facebook friends!)

This recipe is the best basic cupcake recipe I have found, and I have adapted it into many different variations.

It is based on one I found in the April 2009 edition of Australian Gourmet Traveller.

For the Cakes:
125g softened butter; 1 cup caster sugar; 1 tsp vanilla extract (or paste); 2 eggs; 1.5 cups plain flour; .5 tsp baking powder; .5 cup milk
For the Icing: 240g icing sugar; 2 tsp rosewater; turkish delight to decorate.
Heat the oven to 170'C. Beat the butter, sugar & vanilla until light & fluffy (2-3 mins). Add the eggs, one at a time, beating well between each one. Sift over the flour & baking powder, and stir to combine. Add the milk, stirring again to combine. Spoon into patty cases, smooth tops, and bake for 10 - 15 mins. Cool on a rack.
Combine the icing sugar, rose water & mix together. I find that the consistency is too stiff to ice with, so I add some room-temp water a VERY SMALL AMOUNT at a time, until I get the desired consistency (a thick-ish drizzle).
Ice the cup cakes, and top with a bit of the turkish delight.
Some of the variations I have used include using rum instead of rosewater; toast some shredded coconut, and as you ice each one, roll the top in coconut. Don't wait until you've iced them all to do this, as you need the icing to be quite wet for the coconut to stick, and if sets very quickly.
I have also used rose petals instead of turkish delight, for a baby shower.
I have also used baileys, and rolled the cake in smashed up honeycomb for a more decadent version!
Always the same amount of icing sugar (240g); just add as much liquid as you need. If you pour in too much, just add more icing sugar to balance it back.
A Big Thank You to the 5 people who are now my followers! Yay!
Let me know if you want the tagine recipe: it is very easy, and you could do it in a casserole dish, or even a baking dish with some alfoil.
A.
x

This is the rum & toasted coconut version; in the upper right of the photo is the two-tied chocolate & praline birthday cake I also made for the day.